Dodongo's Cavern: Walkthrough (Switch 2)
Follow the Switch 2 route through Dodongo's Cavern: Open the lobby and take the map. Illustrated steps explain the actions, requirements and next objectives.
How do I complete this area?
Use the nearby Bomb Flower to break the entrance wall. In the lava lobby, go left to the northwest wall and bomb it to reach the map chest.
Walkthrough · 1 / 12
Open the lobby and take the map
Child · Main route
- Use the nearby Bomb Flower to break the entrance wall. In the lava lobby, go left to the northwest wall and bomb it to reach the map chest.
- Avoid the laser statues by moving; use Bomb Flowers against them instead of sword attacks.
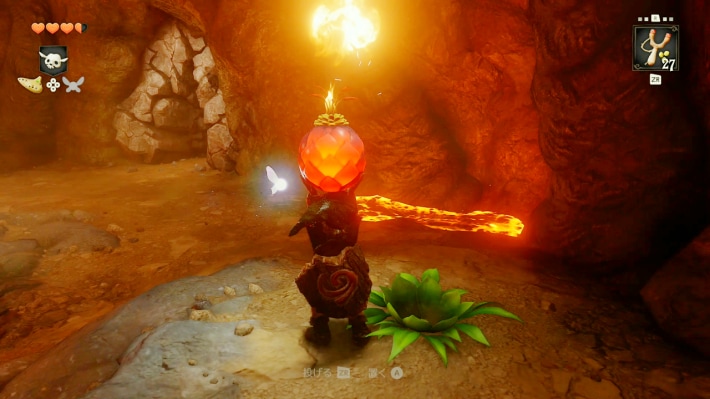
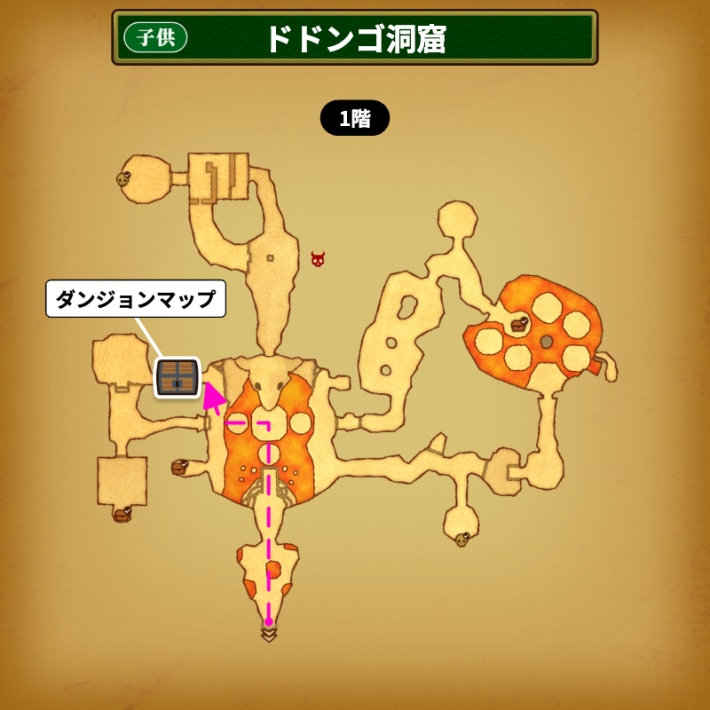
Result / next stop: Collect the dungeon map and return to the lobby.
Could not save. Export your records before leaving.
Source maps and images
GameWith · 2026-11-06Source-based guide · individual gameplay conditions may need verification Maps and screenshots retain their source attribution. Third-party ownership and reuse terms are unchanged.
Walkthrough · 2 / 12
Open the eastern route
Child · Main route
- Cross to the east side of the lobby and bomb its southern wall. Follow the corridor and push the statue onto the floor switch to hold the door open.
- In the next combat room, block each Lizalfos attack and counter; defeat both.
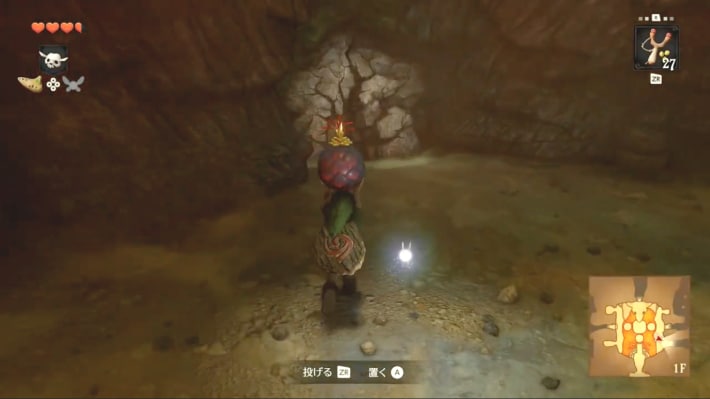
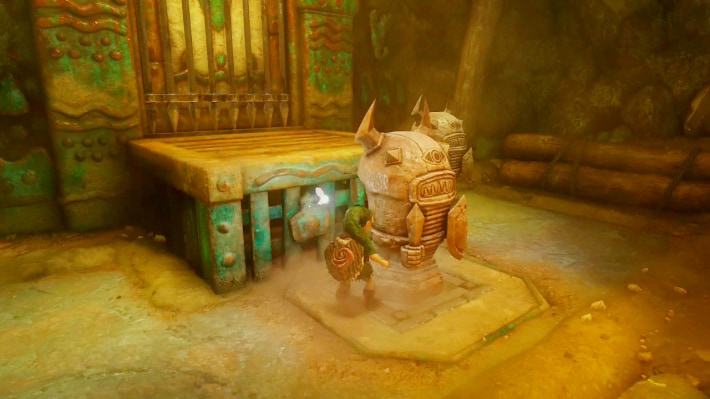
Result / next stop: The route to the torch room opens.
Could not save. Export your records before leaving.
Source maps and images
GameWith · 2026-11-06Source-based guide · individual gameplay conditions may need verification Maps and screenshots retain their source attribution. Third-party ownership and reuse terms are unchanged.
Step location is described in the guide; no precise map marker is available.
Walkthrough · 3 / 12
Light three torches and cross back
Child · Main route
- Carry fire with a Deku Stick to all three torches in the next room. If you lack sticks, return to the merchant behind the breakable wall in the preceding passage.
- Go through the opened door, step on the switch and cross the lobby to the newly opened opposite door.
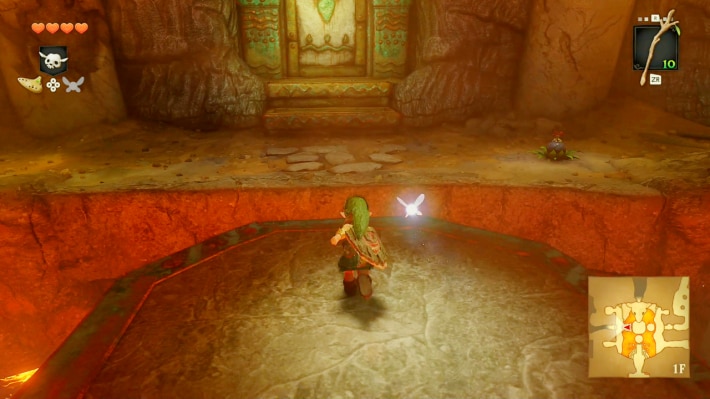
Result / next stop: Reach the room lined with Bomb Flowers.
Could not save. Export your records before leaving.
Source maps and images
GameWith · 2026-11-06Source-based guide · individual gameplay conditions may need verification Maps and screenshots retain their source attribution. Third-party ownership and reuse terms are unchanged.
Step location is described in the guide; no precise map marker is available.
Walkthrough · 4 / 12
Collect the compass and lower the stairs
Child · Main route
- Bomb the breakable wall in the Bomb Flower room. Use a Bomb Flower to defeat the Armos guarding the chest and take the compass.
- Return to the flower rows and place a picked flower in their gap to trigger a chain explosion. Climb the lowered staircase.
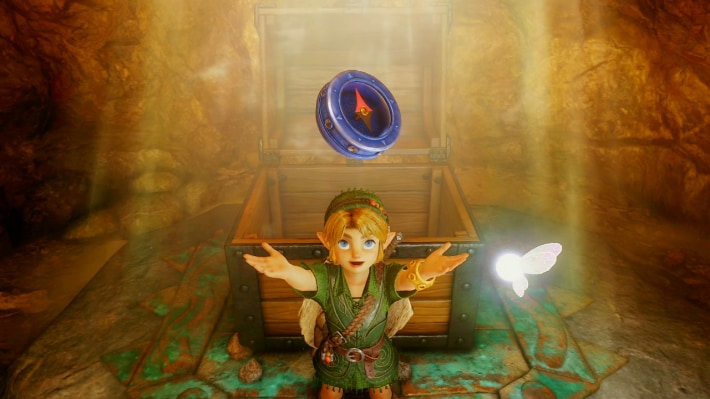
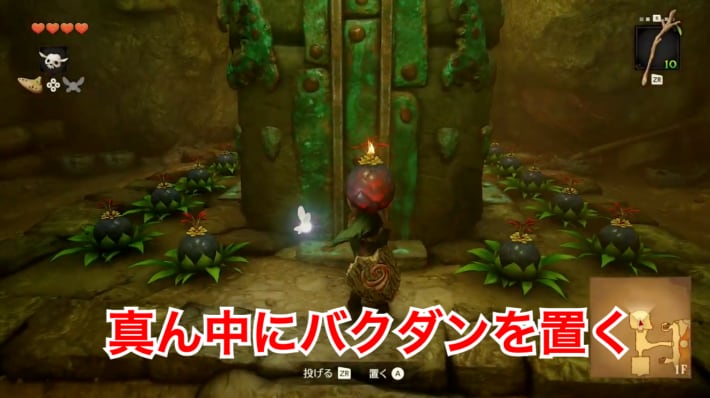
Result / next stop: Reach the second floor.
Could not save. Export your records before leaving.
Source maps and images
GameWith · 2026-11-06Source-based guide · individual gameplay conditions may need verification Maps and screenshots retain their source attribution. Third-party ownership and reuse terms are unchanged.
Step location is described in the guide; no precise map marker is available.
Walkthrough · 5 / 12
Move the safe statue
Child · Main route
- In the room with four statues, move only the one blocking the ladder; the others are Armos. Climb, press the switch and take the opened door.
- Cross the suspension bridge, jumping its gaps instead of dropping to the lobby.
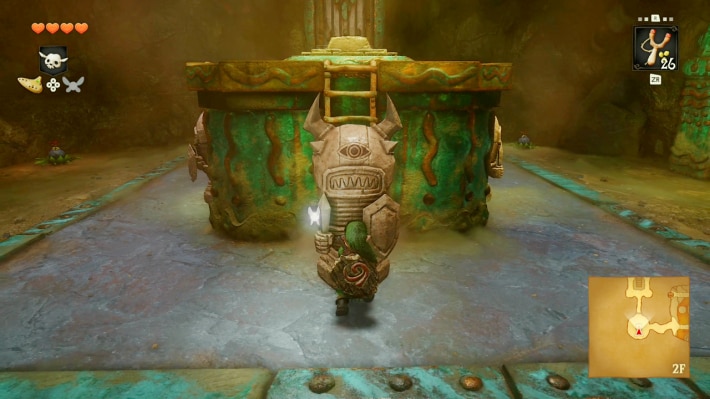
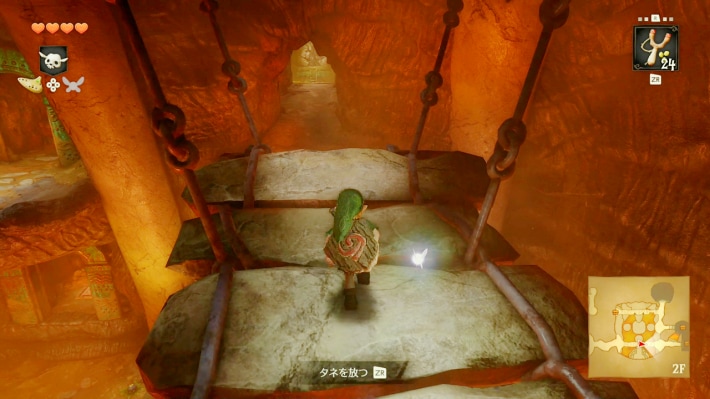
Result / next stop: Reach the next puzzle room.
Could not save. Export your records before leaving.
Source maps and images
GameWith · 2026-11-06Source-based guide · individual gameplay conditions may need verification Maps and screenshots retain their source attribution. Third-party ownership and reuse terms are unchanged.
Step location is described in the guide; no precise map marker is available.
Walkthrough · 6 / 12
Bomb the wall above the ladder
Child · Main route
- Move the block on the right to reach the ladder. From the top turn around and jump to the nearby chest platform.
- Pick its Bomb Flower and throw it into the recess in the wall above the ladder. Climb back through the cleared opening.
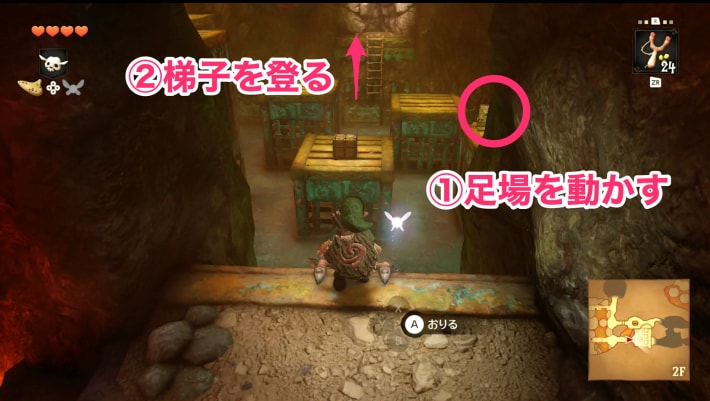
Result / next stop: The upper passage is clear.
Could not save. Export your records before leaving.
Source maps and images
GameWith · 2026-11-06Source-based guide · individual gameplay conditions may need verification Maps and screenshots retain their source attribution. Third-party ownership and reuse terms are unchanged.
Step location is described in the guide; no precise map marker is available.
Walkthrough · 7 / 12
Shoot the eyes and defeat the second pair
Child · Main route
- Shoot the square eye beyond the flames with the slingshot and cross while the fire is out. Defeat both Lizalfos in the next room by blocking and countering.
- In the next flame puzzle, shoot the eye ahead, then locate and shoot the additional eye on the left.
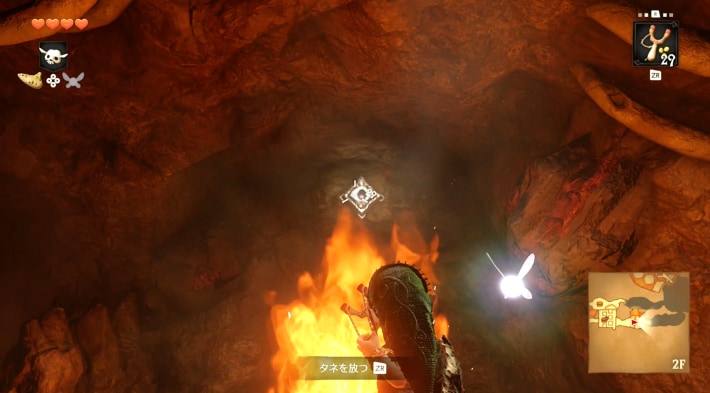
Result / next stop: Clear the fire-blocked route.
Could not save. Export your records before leaving.
Source maps and images
GameWith · 2026-11-06Source-based guide · individual gameplay conditions may need verification Maps and screenshots retain their source attribution. Third-party ownership and reuse terms are unchanged.
Step location is described in the guide; no precise map marker is available.
Walkthrough · 8 / 12
Take the Bomb Bag
Child · Main route
- Continue into the open room after the eye puzzles. Climb to the raised ledge on the right and open its chest.
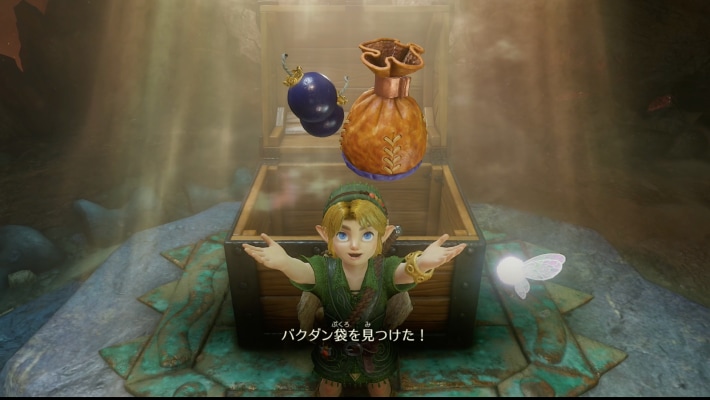
Result / next stop: Obtain the Bomb Bag; bombs no longer require a nearby flower.
Could not save. Export your records before leaving.
Source maps and images
GameWith · 2026-11-06Source-based guide · individual gameplay conditions may need verification Maps and screenshots retain their source attribution. Third-party ownership and reuse terms are unchanged.
Walkthrough · 9 / 12
Light both eyes of the giant skull
Child · Main route
- Continue to the bridge above the giant Dodongo skull. Drop a bomb through each bridge hole so it explodes inside an eye socket.
- Once both eyes light and the mouth opens, drop to the lobby and enter the mouth.
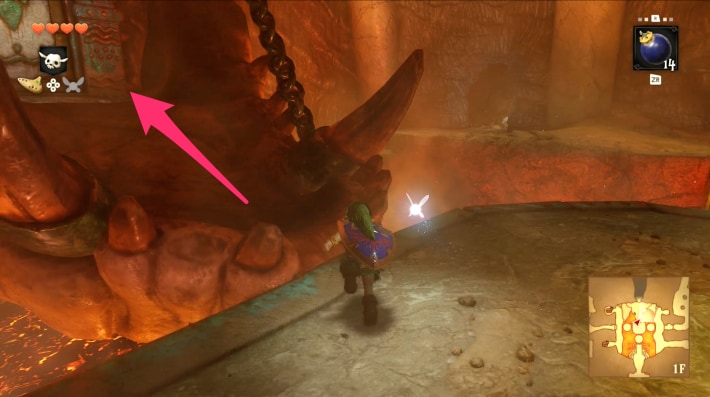
Result / next stop: Access the final block puzzles.
Could not save. Export your records before leaving.
Source maps and images
GameWith · 2026-11-06Source-based guide · individual gameplay conditions may need verification Maps and screenshots retain their source attribution. Third-party ownership and reuse terms are unchanged.
Step location is described in the guide; no precise map marker is available.
Walkthrough · 10 / 12
Move the blocks to hold the final switch
Child · Main route
- Inside the mouth, take the northern passage. Move the lower block beneath the upper one, climb and push the upper block down.
- Move that fallen block toward the western passage to climb the raised ledge. Beyond it, push the next block down into the center room's square hole.
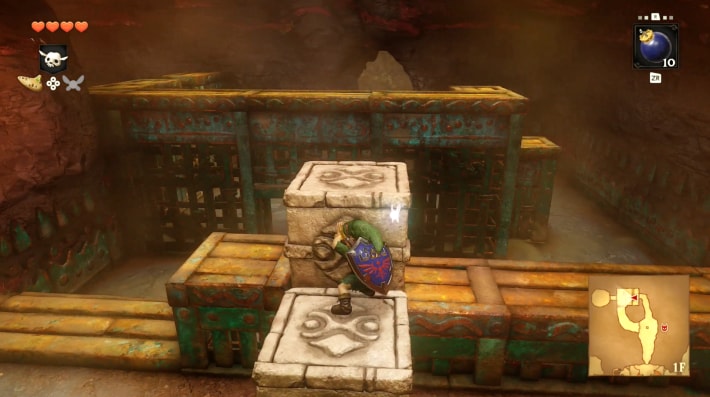
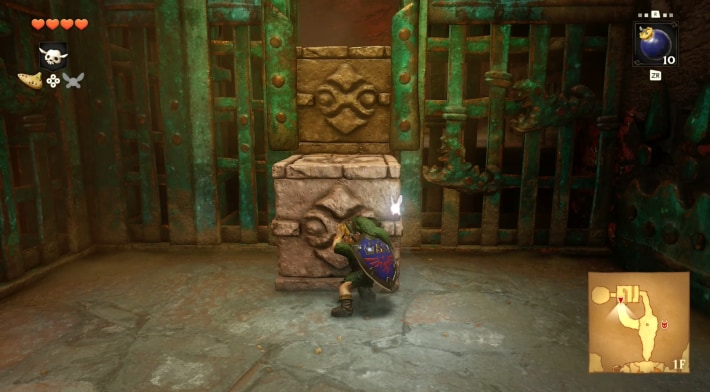
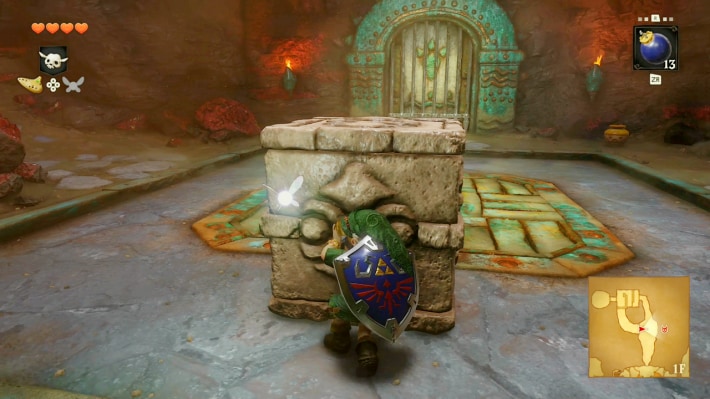
Result / next stop: The final door stays open.
Could not save. Export your records before leaving.
Source maps and images
GameWith · 2026-11-06Source-based guide · individual gameplay conditions may need verification Maps and screenshots retain their source attribution. Third-party ownership and reuse terms are unchanged.
Step location is described in the guide; no precise map marker is available.
Walkthrough · 11 / 12
Break the cracked floor
Child · Main route
- Enter the room beyond the opened door and put a bomb directly on the floor crack. If you are out of bombs, break the nearby pots first.
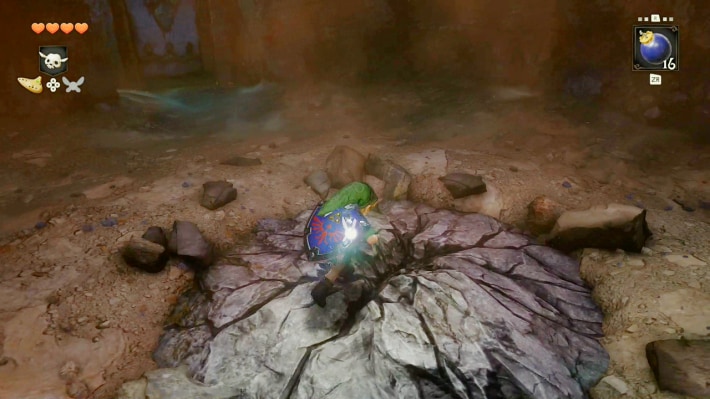
Result / next stop: Drop through the new hole to face King Dodongo.
Could not save. Export your records before leaving.
Source maps and images
GameWith · 2026-11-06Source-based guide · individual gameplay conditions may need verification Maps and screenshots retain their source attribution. Third-party ownership and reuse terms are unchanged.
Step location is described in the guide; no precise map marker is available.
Walkthrough · 12 / 12
Defeat King Dodongo
Child · Main route
- When the boss opens its mouth to breathe fire, throw a bomb inside. While it is stunned, strike its tongue with your sword.
- When it recovers, retreat to a room corner to avoid its rolling attack. Clear Baby Dodongos with sword or slingshot; repeat the bomb-and-strike cycle.
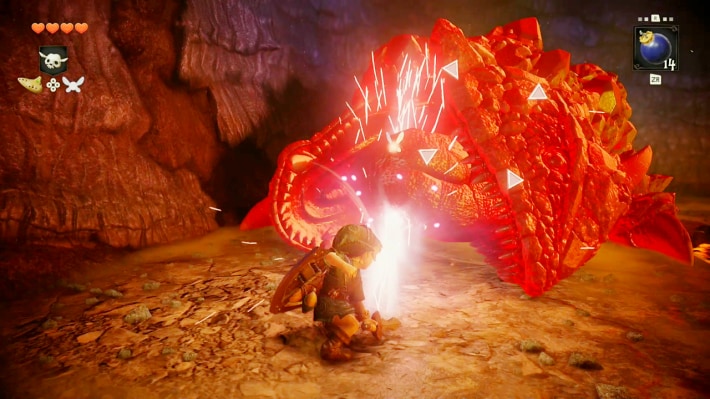
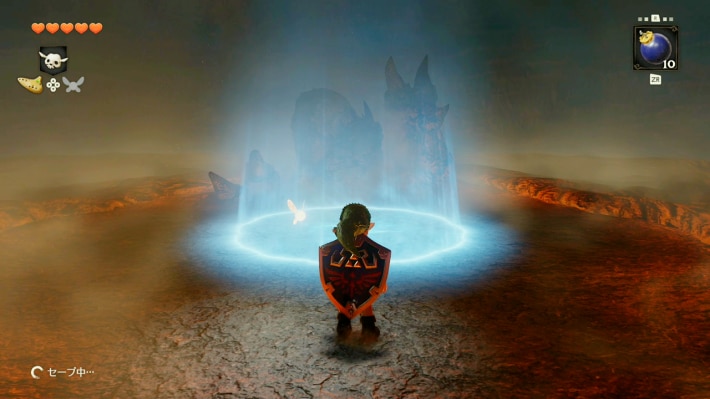
Result / next stop: Use the blue warp after victory and receive the Goron's Ruby outside.
Could not save. Export your records before leaving.
Source maps and images
GameWith · 2026-11-06Source-based guide · individual gameplay conditions may need verification Maps and screenshots retain their source attribution. Third-party ownership and reuse terms are unchanged.
Related guides
Related Articles
dungeons
Bottom of the Well: Walkthrough (Switch 2)
Follow the Switch 2 route through Bottom of the Well: Drain the village well. Illustrated steps explain the actions, requirements and next objectives.
dungeons
Fire Temple: Walkthrough (Switch 2)
Follow the Switch 2 route through Fire Temple: Rescue the first Goron. Illustrated steps explain the actions, requirements and next objectives.
dungeons
Ganon's Castle: Walkthrough (Switch 2)
Follow the Switch 2 route through Ganon's Castle: Cross the rainbow bridge. Illustrated steps explain the actions, requirements and next objectives.
Was this helpful?
Thanks for the feedback!