Fire Temple: Walkthrough (Switch 2)
Follow the Switch 2 route through Fire Temple: Rescue the first Goron. Illustrated steps explain the actions, requirements and next objectives.
How do I complete this area?
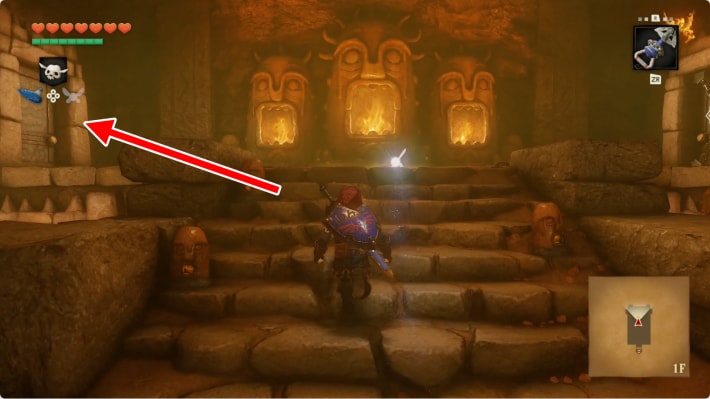
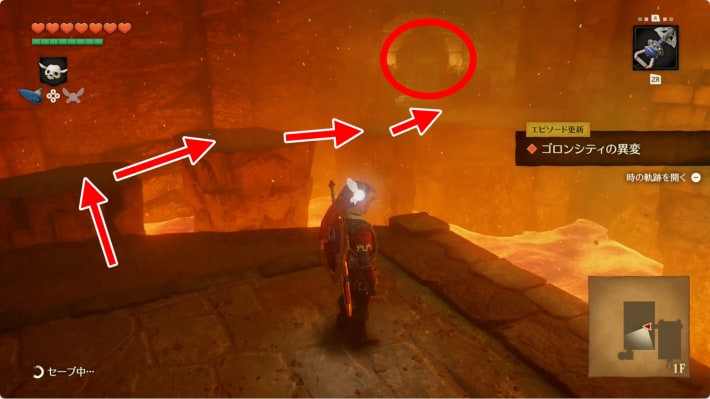
Climb the entrance stairs and take the left door to meet Darunia. Cross the ledges on the left, step on the cell switch and open the chest inside for a Small Key. Return to the entrance stairs.
Walkthrough · 1 / 14
Rescue the first Goron
Fire Temple
- Climb the entrance stairs and take the left door to meet Darunia. Cross the ledges on the left, step on the cell switch and open the chest inside for a Small Key. Return to the entrance stairs.
Could not save. Export your records before leaving.
Source maps and images
GameWith · 2026-11-06Source-based guide · individual gameplay conditions may need verification Maps and screenshots retain their source attribution. Third-party ownership and reuse terms are unchanged.
Step location is described in the guide; no precise map marker is available.
Walkthrough · 2 / 14
Collect both bridge-room keys
Fire Temple
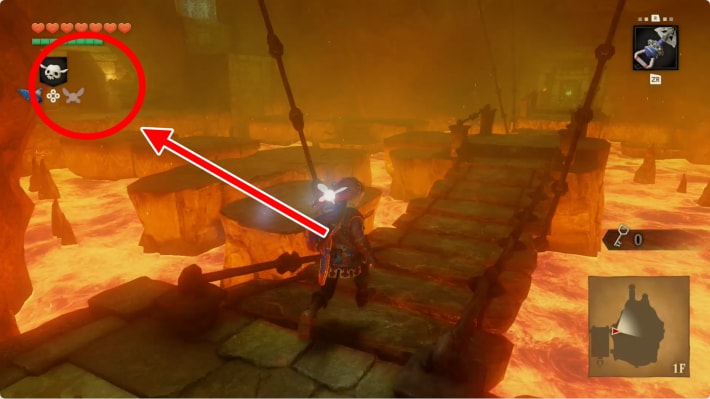
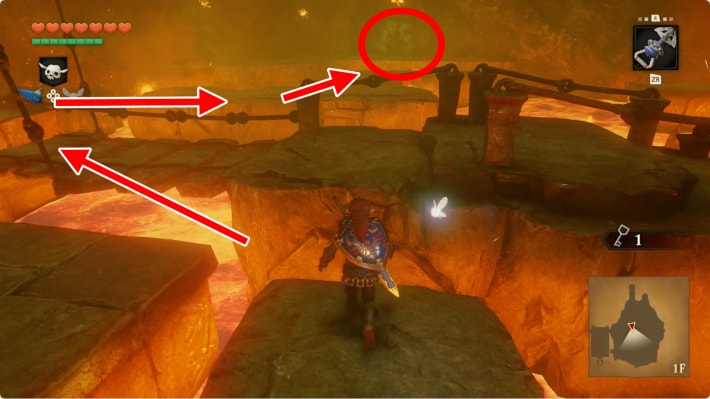
- Unlock the opposite entrance door. In the lava bridge room, cross toward the left ledges and free the Goron for a key. Return to the bridge, go to the opposite side and bomb the rock hiding another cell; rescue its Goron and take the second key.
Could not save. Export your records before leaving.
Source maps and images
GameWith · 2026-11-06Source-based guide · individual gameplay conditions may need verification Maps and screenshots retain their source attribution. Third-party ownership and reuse terms are unchanged.
Step location is described in the guide; no precise map marker is available.
Walkthrough · 3 / 14
Ride the lava-powered block
Fire Temple
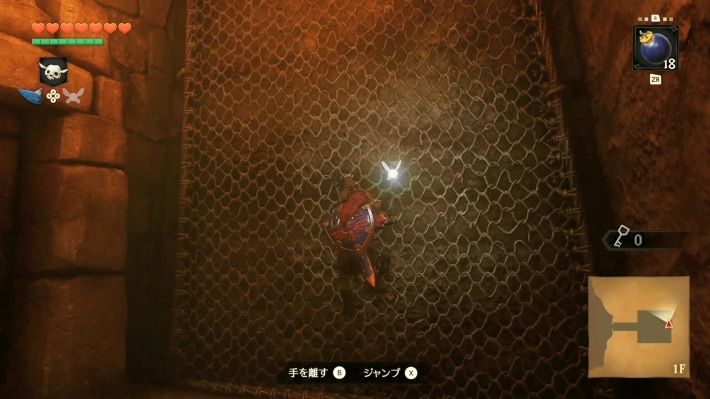
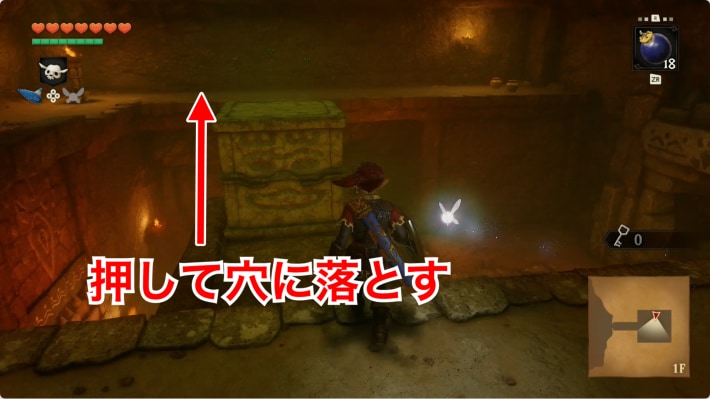
- Return to the bridge and unlock the onward doors. Climb the mesh on the left, guard against the bats, then drop to the central ledge and push its block down. Jump onto the block to ride up to 2F.
Could not save. Export your records before leaving.
Source maps and images
GameWith · 2026-11-06Source-based guide · individual gameplay conditions may need verification Maps and screenshots retain their source attribution. Third-party ownership and reuse terms are unchanged.
Step location is described in the guide; no precise map marker is available.
Walkthrough · 4 / 14
Switch the fire and climb
Fire Temple
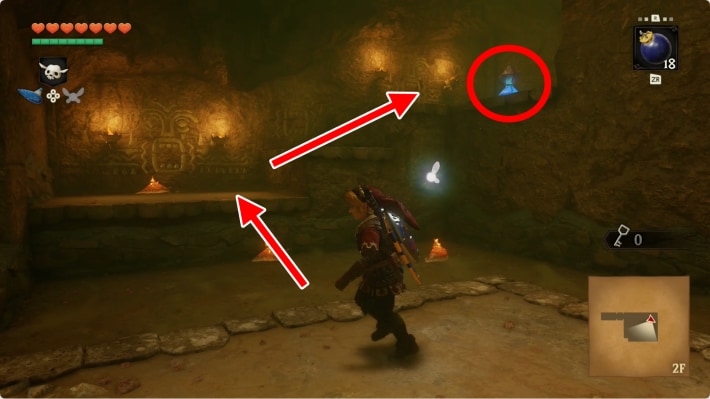
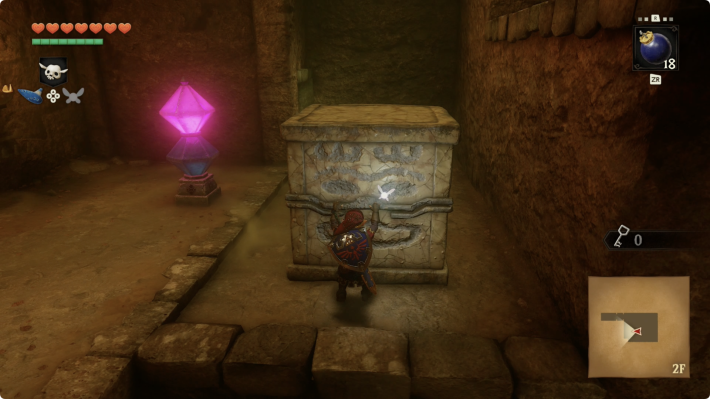
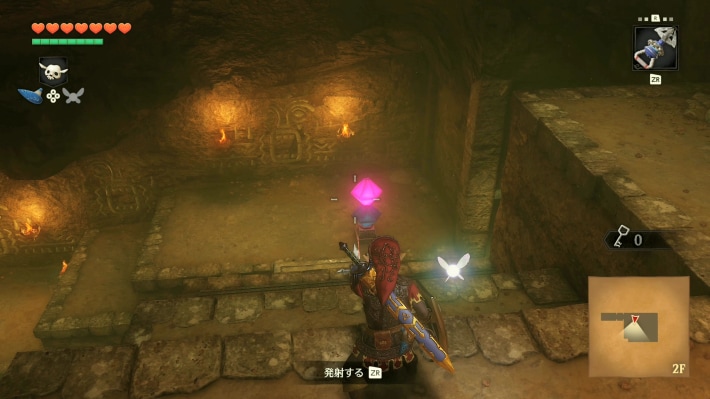
- Climb the left ledge and strike the crystal switch to change the flame jets. Move the nearby block against the higher ledge and climb it. From above, shoot the switch again to clear the mesh, then climb onward.
Could not save. Export your records before leaving.
Source maps and images
GameWith · 2026-11-06Source-based guide · individual gameplay conditions may need verification Maps and screenshots retain their source attribution. Third-party ownership and reuse terms are unchanged.
Step location is described in the guide; no precise map marker is available.
Walkthrough · 5 / 14
Boulder rooms and the eye switch
Fire Temple
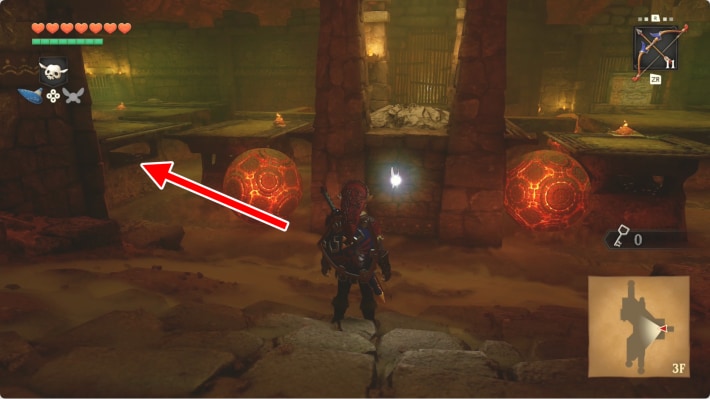
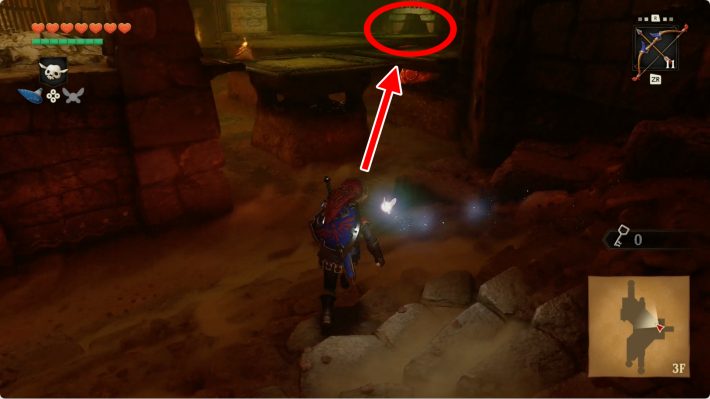
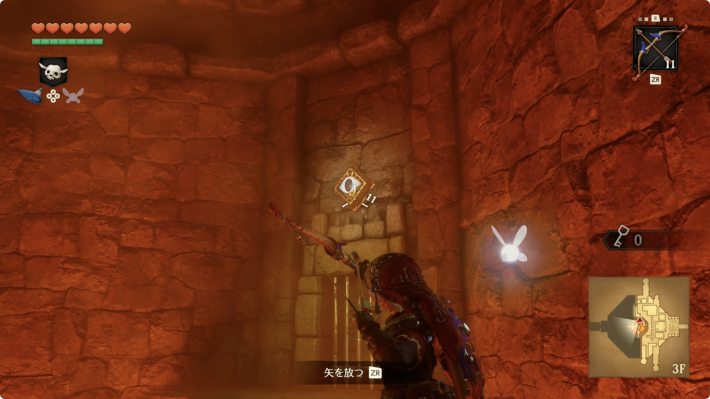
- Avoid rolling rocks while checking the left room for the map and the opposite cell for a Small Key. Back in the boulder room, follow the right side to a locked door. Shoot the square eye high on the right wall, enter the opened room and take the Compass.
Could not save. Export your records before leaving.
Source maps and images
GameWith · 2026-11-06Source-based guide · individual gameplay conditions may need verification Maps and screenshots retain their source attribution. Third-party ownership and reuse terms are unchanged.
Step location is described in the guide; no precise map marker is available.
Walkthrough · 6 / 14
Escape the fire and free two Gorons
Fire Temple
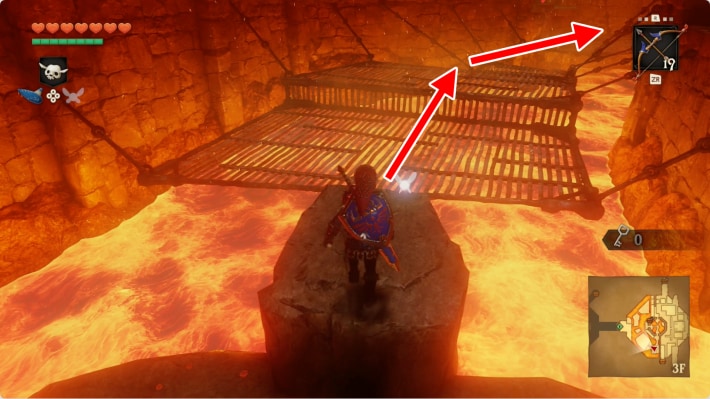
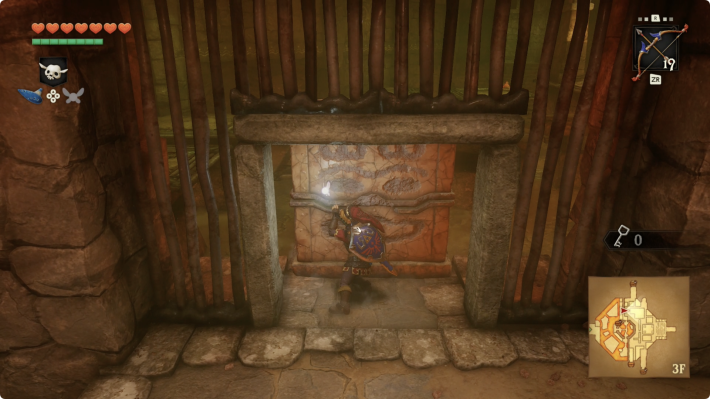
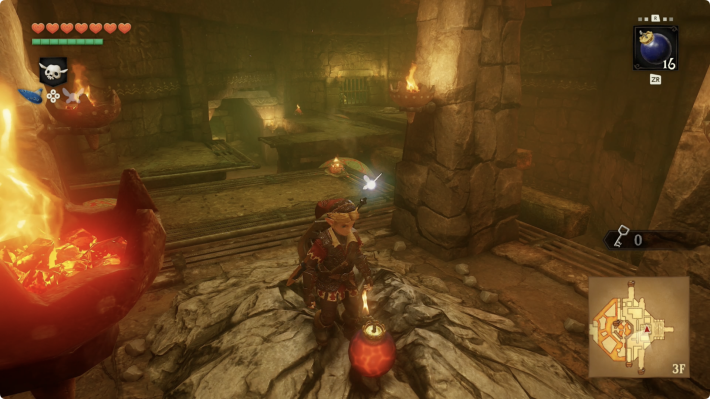
- Return to the previous room and take its right door. Cross the mesh north before the following fire catches you, climb the far ledge and push the blocking cube down. Cross the upper platforms south for a Goron key. Return and bomb the cracked floor; descend for another Goron key, then climb the mesh back up.
Could not save. Export your records before leaving.
Source maps and images
GameWith · 2026-11-06Source-based guide · individual gameplay conditions may need verification Maps and screenshots retain their source attribution. Third-party ownership and reuse terms are unchanged.
Step location is described in the guide; no precise map marker is available.
Walkthrough · 7 / 14
Find the fire-maze key and hold its switch
Fire Temple
- Return to the lava area and unlock the next route. In the fire maze, small flames warn where proximity-triggered walls rise: detour around them to the right-hand cell and take its key. Backtrack to the south-central locked door; move the nearby block onto the northwest floor switch to keep the flames off, then unlock the onward door.
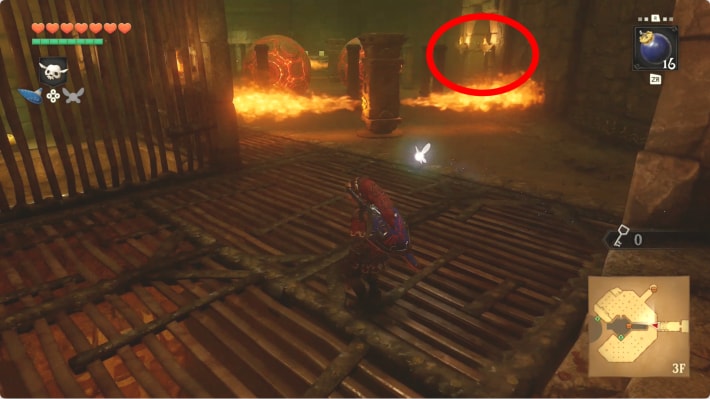
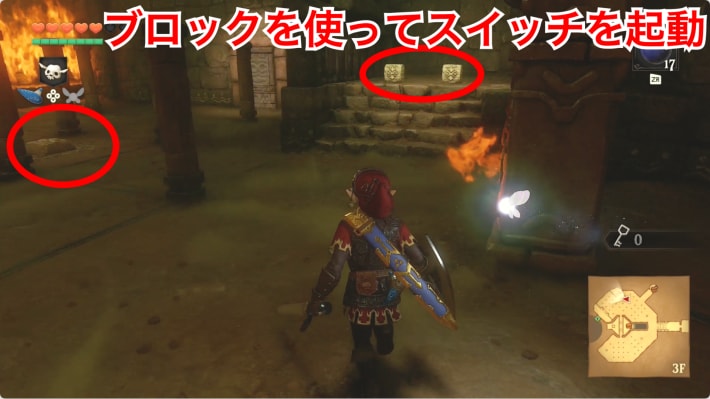
Could not save. Export your records before leaving.
Source maps and images
GameWith · 2026-11-06Source-based guide · individual gameplay conditions may need verification Maps and screenshots retain their source attribution. Third-party ownership and reuse terms are unchanged.
Step location is described in the guide; no precise map marker is available.
Walkthrough · 8 / 14
Pull out the Flare Dancer’s core
Fire Temple
- Guard while the dancer circles the room and avoid fire on the floor. When it stops, pull its core free with the Hookshot, circle the other way to intercept it and strike with the sword. Repeat, then ride the central platform upward.
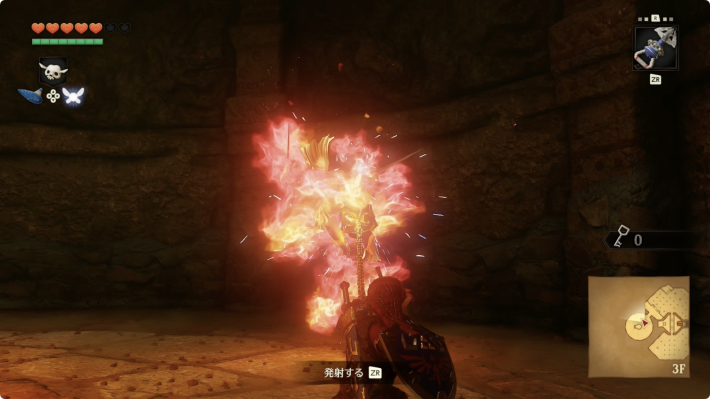
Could not save. Export your records before leaving.
Source maps and images
GameWith · 2026-11-06Source-based guide · individual gameplay conditions may need verification Maps and screenshots retain their source attribution. Third-party ownership and reuse terms are unchanged.
Step location is described in the guide; no precise map marker is available.
Walkthrough · 9 / 14
Use the delayed bomb and reach the Hammer
Fire Temple
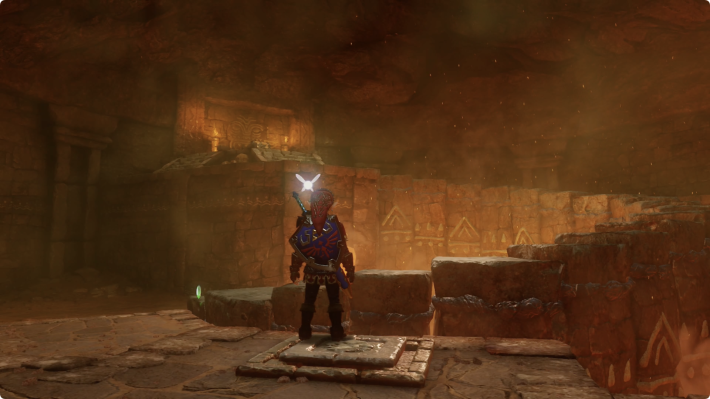
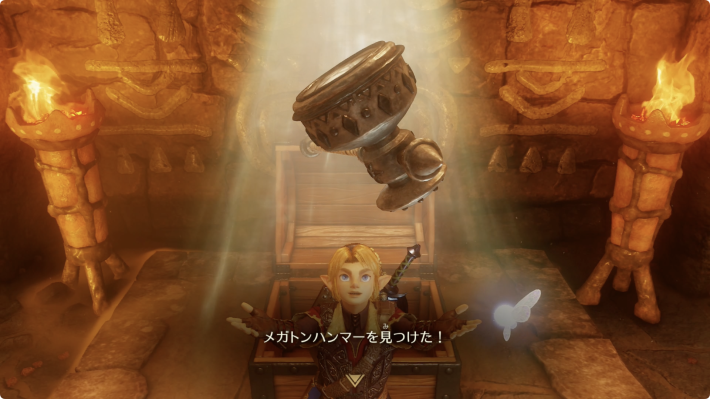
- Climb the mesh above the dancer. Throw a Bomb Flower toward the southwest switch to toggle it; throw another and move toward the blocked climb before it explodes, then ascend when the fire switches off. Clear flying enemies, press the timed floor switch and follow the narrow rising path to the Megaton Hammer chest.
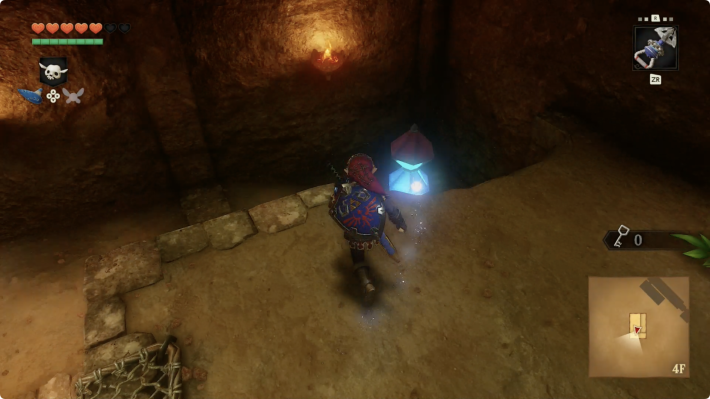
Could not save. Export your records before leaving.
Source maps and images
GameWith · 2026-11-06Source-based guide · individual gameplay conditions may need verification Maps and screenshots retain their source attribution. Third-party ownership and reuse terms are unchanged.
Walkthrough · 10 / 14
Hammer the route downward
Fire Temple
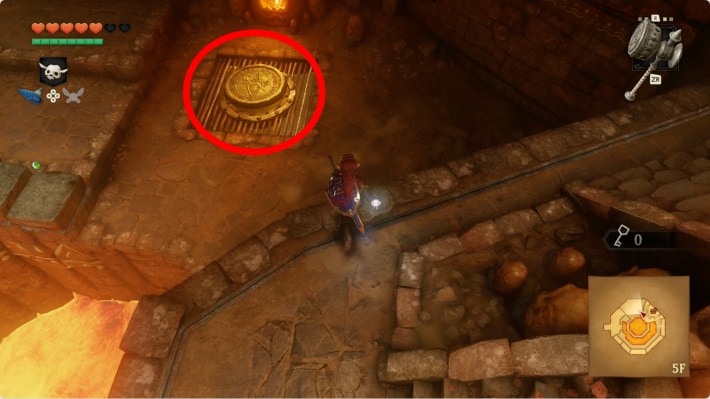
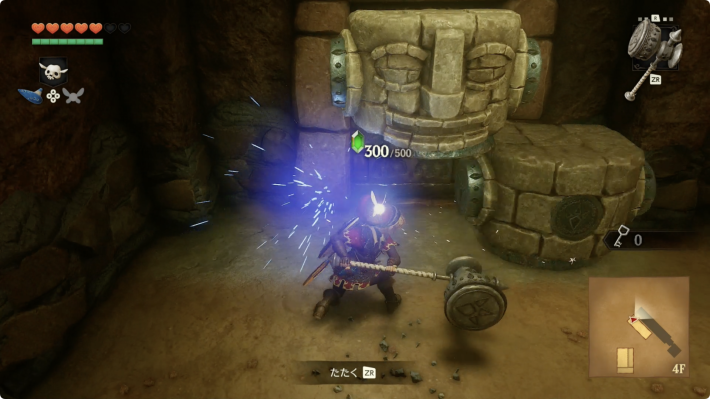
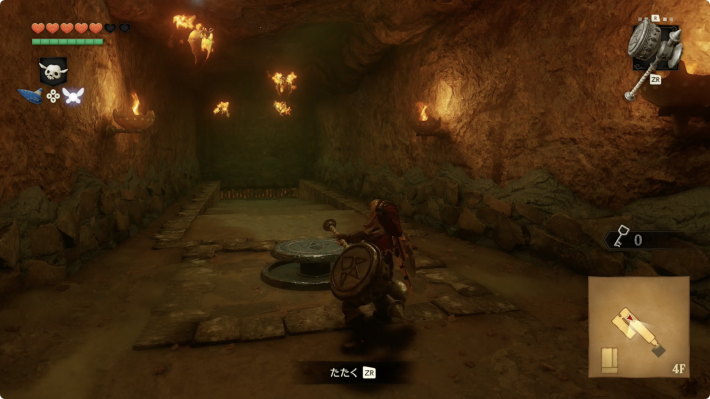
- Drop off the northern ledge near the hammer chest and strike the floor block to fall through. Hit the face pillar from the side to expose a door. Hammer the floor switch into stairs; smash the next floor block and the ore obstructing the lower route.
Could not save. Export your records before leaving.
Source maps and images
GameWith · 2026-11-06Source-based guide · individual gameplay conditions may need verification Maps and screenshots retain their source attribution. Third-party ownership and reuse terms are unchanged.
Step location is described in the guide; no precise map marker is available.
Walkthrough · 11 / 14
Get the last small key and create the boss bridge
Fire Temple
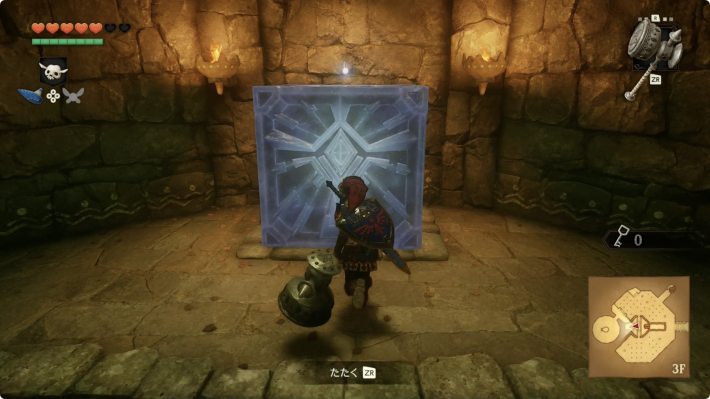
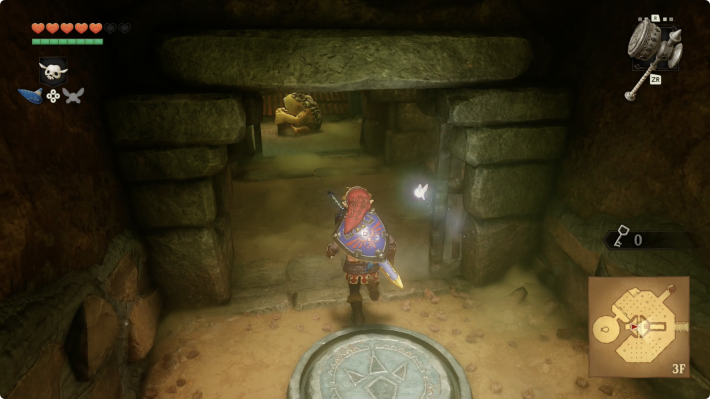
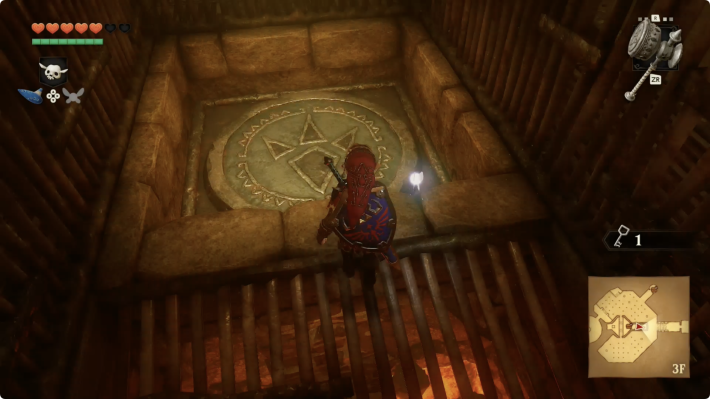
- Play the Song of Time beside the blue block in the next room. Descend, hammer the switch and take the rescued Goron’s key. Continue onward and hammer the large floor block down with you: it becomes the missing platform in the boss approach. Drop through to 1F and take the unlocked door back to the entrance.
Could not save. Export your records before leaving.
Source maps and images
GameWith · 2026-11-06Source-based guide · individual gameplay conditions may need verification Maps and screenshots retain their source attribution. Third-party ownership and reuse terms are unchanged.
Step location is described in the guide; no precise map marker is available.
Walkthrough · 12 / 14
Clear the entrance’s eastern rooms
Fire Temple
- Strike the face pillar beside the eastern stairs from the side. Clear all enemies in the next room; hammering the floor flips them for sword attacks. In the following room, block every flying tile before killing the Like Like. If it swallows your gear, defeat it to recover it.
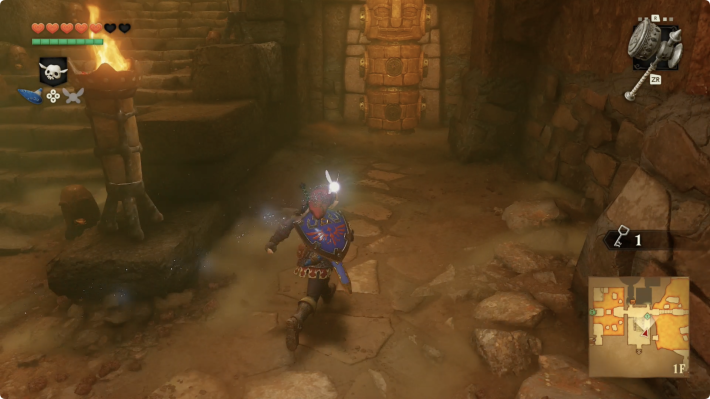
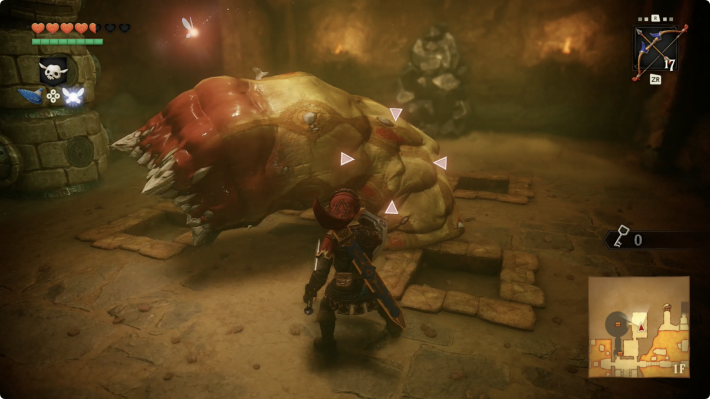
Could not save. Export your records before leaving.
Source maps and images
GameWith · 2026-11-06Source-based guide · individual gameplay conditions may need verification Maps and screenshots retain their source attribution. Third-party ownership and reuse terms are unchanged.
Step location is described in the guide; no precise map marker is available.
Walkthrough · 13 / 14
Second dancer and Boss Key
Fire Temple
- Fight another Flare Dancer with the same Hookshot-and-sword method. Open its chest and proceed to the next cell. Hammer the switch, rescue the Goron and take the Boss Key from his chest. Continue to the entrance and turn left toward the completed boss bridge.
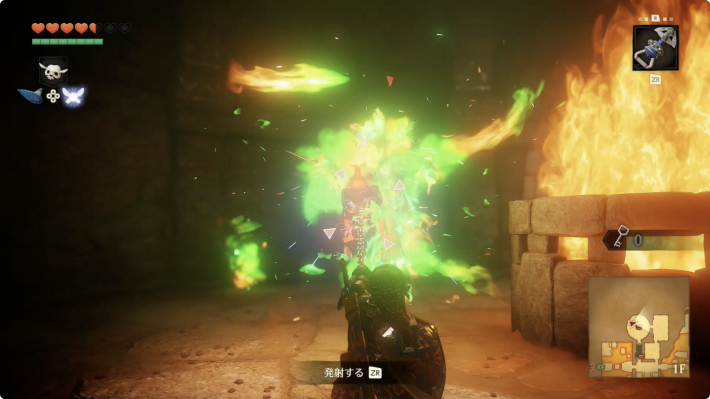
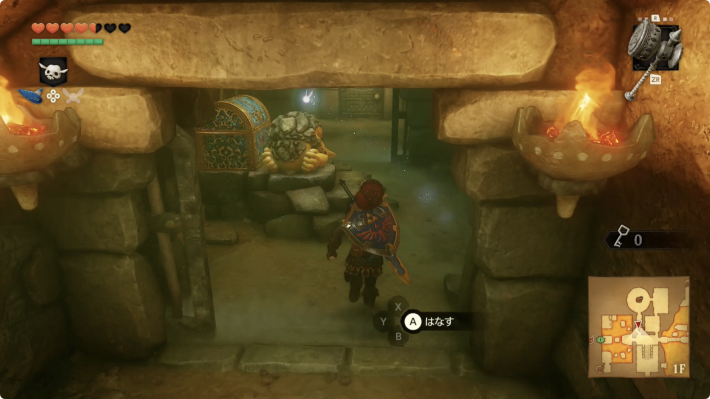
Could not save. Export your records before leaving.
Source maps and images
GameWith · 2026-11-06Source-based guide · individual gameplay conditions may need verification Maps and screenshots retain their source attribution. Third-party ownership and reuse terms are unchanged.
Walkthrough · 14 / 14
Defeat Volvagia
Fire Temple
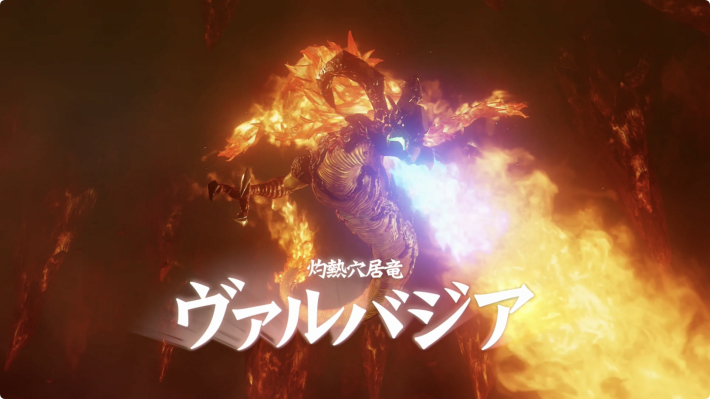
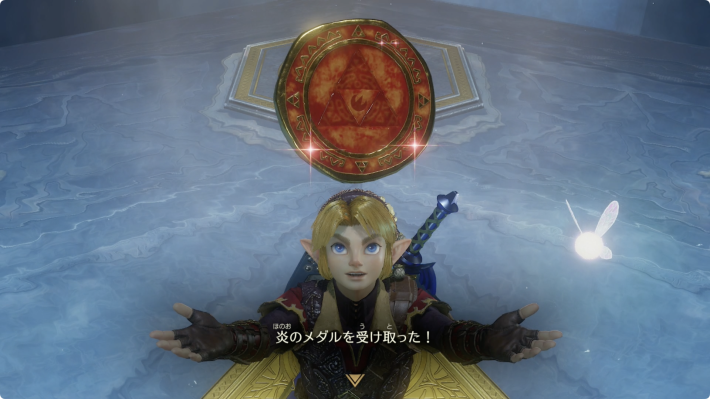
- Unlock the boss door and cross to the central arena. When Volvagia’s head emerges from a hole, strike it with the Hammer, then slash while it is down. Concentrate on evasion during its airborne attacks and avoid the lava openings. Take the Heart Container before the warp awards the Fire Medallion.
Could not save. Export your records before leaving.
Source maps and images
GameWith · 2026-11-06Source-based guide · individual gameplay conditions may need verification Maps and screenshots retain their source attribution. Third-party ownership and reuse terms are unchanged.
Related guides
Related Articles
dungeons
Bottom of the Well: Walkthrough (Switch 2)
Follow the Switch 2 route through Bottom of the Well: Drain the village well. Illustrated steps explain the actions, requirements and next objectives.
dungeons
Dodongo's Cavern: Walkthrough (Switch 2)
Follow the Switch 2 route through Dodongo's Cavern: Open the lobby and take the map. Illustrated steps explain the actions, requirements and next objectives.
dungeons
Ganon's Castle: Walkthrough (Switch 2)
Follow the Switch 2 route through Ganon's Castle: Cross the rainbow bridge. Illustrated steps explain the actions, requirements and next objectives.
Was this helpful?
Thanks for the feedback!