Deku Tree: Walkthrough (Switch 2)
Follow the Switch 2 route through Deku Tree: Reach the Slingshot. Illustrated steps explain the actions, requirements and next objectives.

How do I complete this area?
Climb to the Map chest, follow the ledge and enter the scrub room. Reflect its projectile with the shield and finish the encounter.
Walkthrough · 1 / 7
Reach the Slingshot
Entrance hall → Map → scrub room → Slingshot
- Climb to the Map chest, follow the ledge and enter the scrub room. Reflect its projectile with the shield and finish the encounter.
- Continue to the unstable bridge and cross to the Slingshot chest. Use the remake’s on-screen movement prompts.
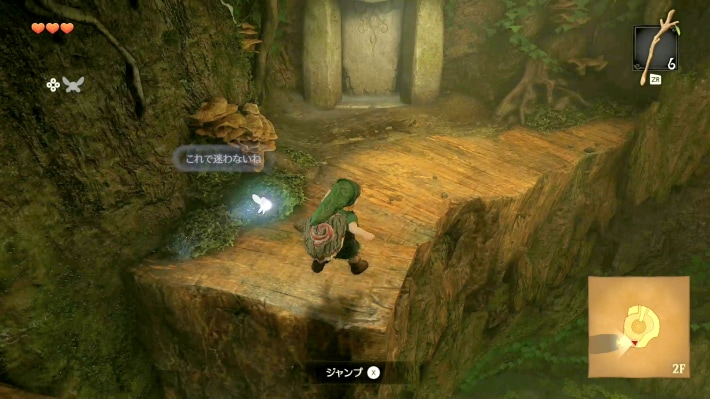
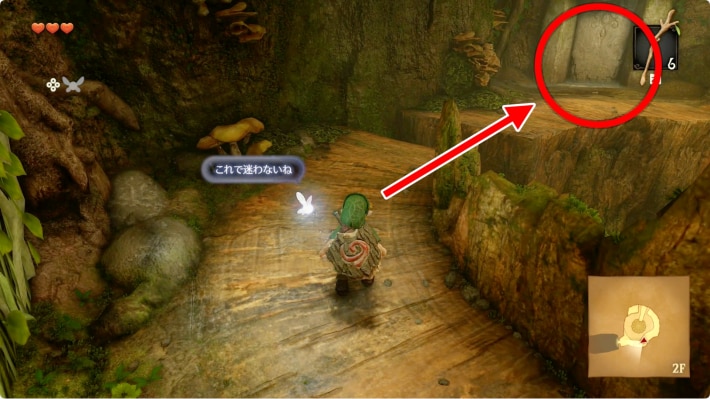
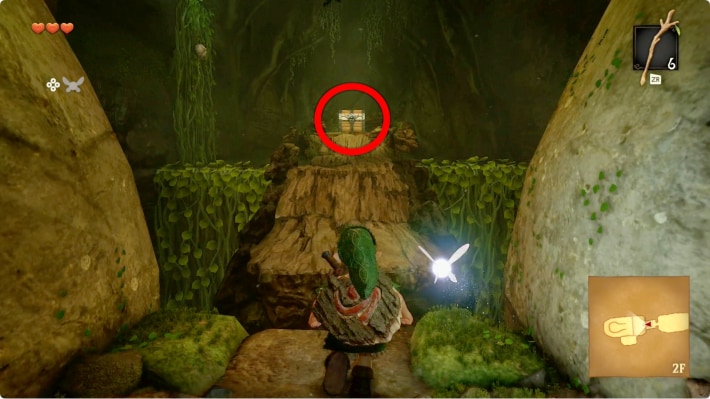
If it goes wrong: If the bridge collapses before you cross, the source describes vines as the recovery path.
Result / next stop: Dungeon Map and Fairy Slingshot acquired.
Could not save. Export your records before leaving.
Source maps and images
GameWith · 2026-11-06Source-based guide · individual gameplay conditions may need verification Maps and screenshots retain their source attribution. Third-party ownership and reuse terms are unchanged.
Walkthrough · 2 / 7
Release the ladder
Slingshot room → entrance hall → upper vines
- Face back toward the exit and shoot the eye-marked target associated with the hanging ladder.
- Climb out, return to the Map area and shoot the spiders before climbing the tall vines.
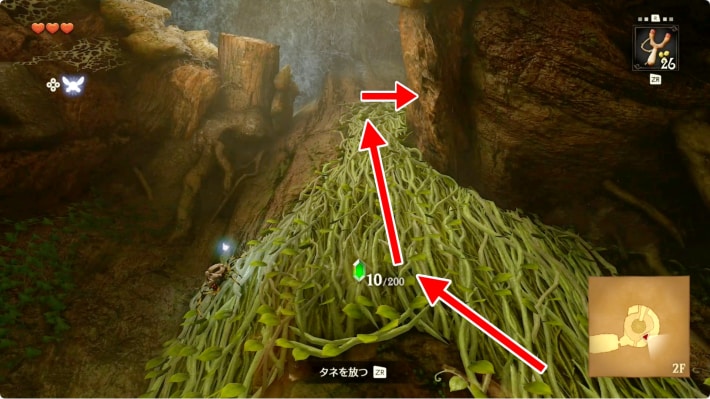
If it goes wrong: Refill seeds from available grass if empty. Do not copy the source’s “R1” label as a confirmed Switch button.
Result / next stop: Reach the upper ledge with the Slingshot available.
Could not save. Export your records before leaving.
Source maps and images
GameWith · 2026-11-06Source-based guide · individual gameplay conditions may need verification Maps and screenshots retain their source attribution. Third-party ownership and reuse terms are unchanged.
Step location is described in the guide; no precise map marker is available.
Walkthrough · 3 / 7
Compass and web drop
Upper ledge → Compass room → central shaft
- Activate the floor switch, cross the raised platforms and open the Compass chest.
- Back in the shaft, clear the hanging spider and drop from the high ledge onto the central web.
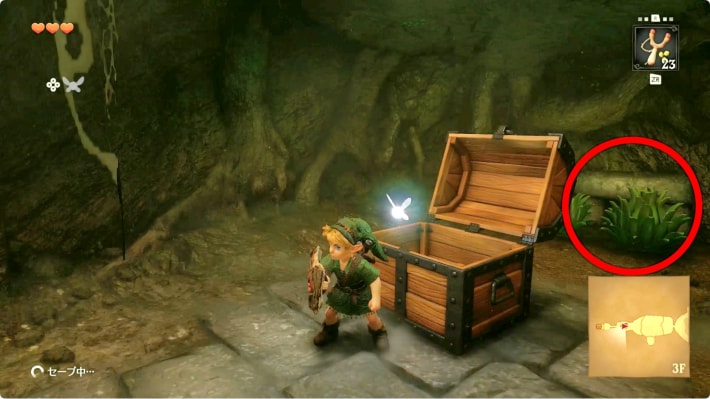
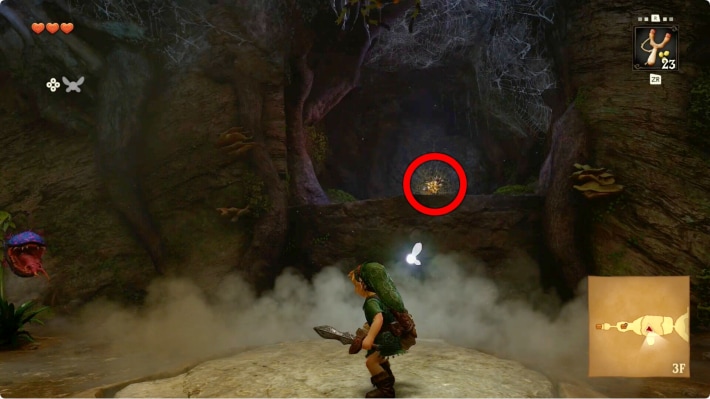
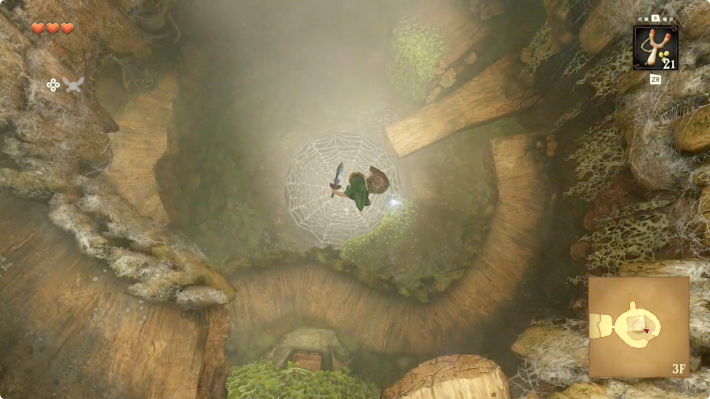
Result / next stop: Compass acquired; reach the water-filled basement.
Could not save. Export your records before leaving.
Source maps and images
GameWith · 2026-11-06Source-based guide · individual gameplay conditions may need verification Maps and screenshots retain their source attribution. Third-party ownership and reuse terms are unchanged.
Walkthrough · 4 / 7
Carry fire
Basement landing → torch → webbed door → eye door
- Step on the switch to expose or light the torch; use a stick to carry fire along the shallow crossing and burn the webbed doorway.
- Reflect the next scrub’s projectile, hear its clue, then shoot the eye above the exit.
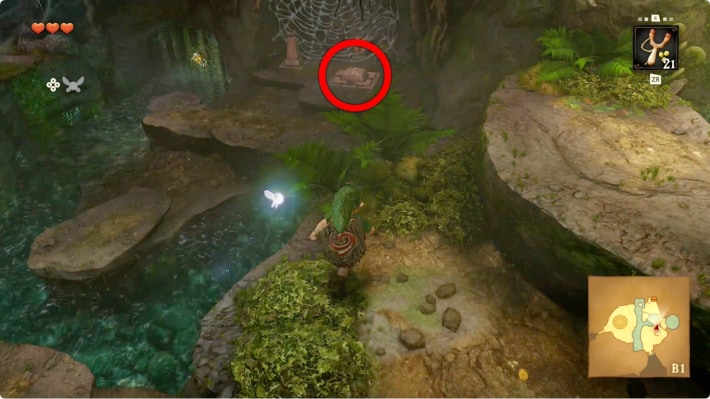
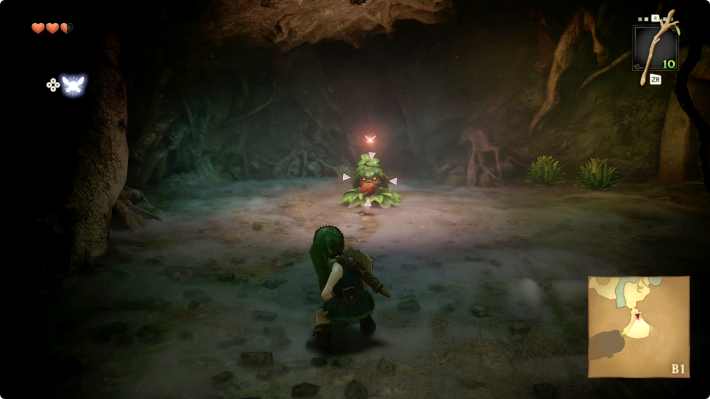
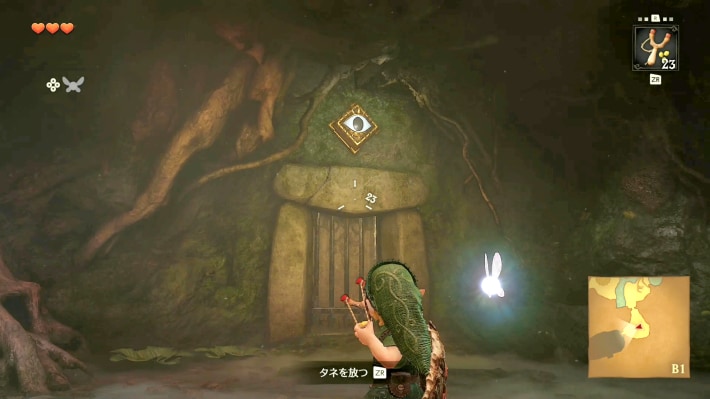
If it goes wrong: Water extinguishes the stick: return to the lit torch. Keep the 2–3–1 clue for the boss approach.
Result / next stop: Open the route into the water-and-spike room.
Could not save. Export your records before leaving.
Source maps and images
GameWith · 2026-11-06Source-based guide · individual gameplay conditions may need verification Maps and screenshots retain their source attribution. Third-party ownership and reuse terms are unchanged.
Walkthrough · 5 / 7
Cross the water room
Water room → block ledge → torch room → larvae room
- Activate the underwater switch and use the lowered water to ride the moving platform under the spiked obstacle; clear the far spider and move the block below the exit.
- Light the three unlit torches from the central flame to open the next door.
- Defeat the larval Gohmas, burn the web across the crawling passage and return through it to the raised side of the basement hall.
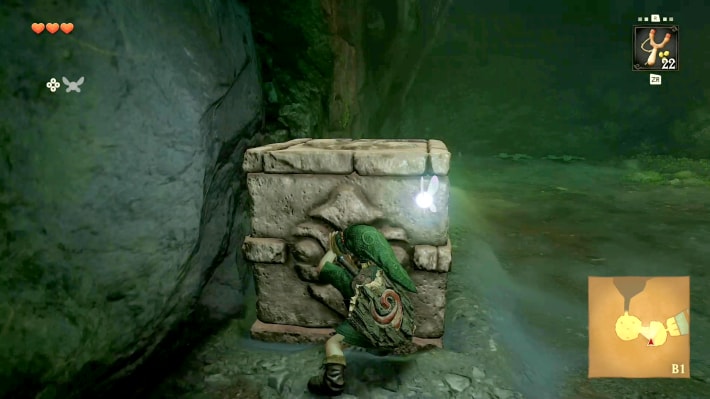
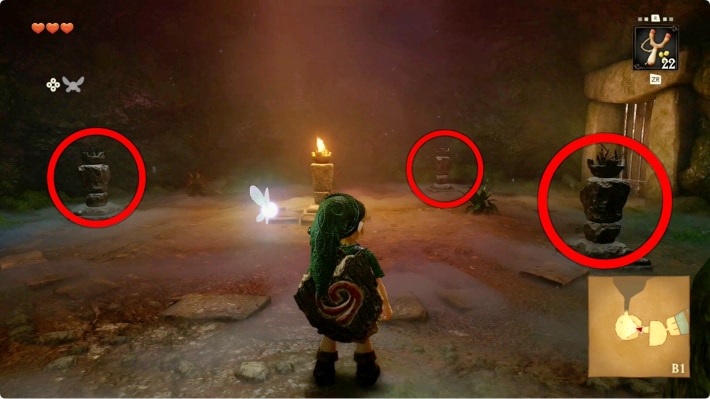
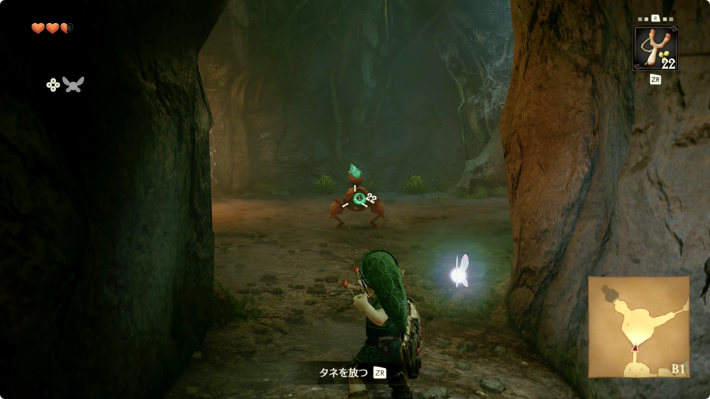
Result / next stop: Return through the crawl passage to the basement’s higher ledge.
Could not save. Export your records before leaving.
Source maps and images
GameWith · 2026-11-06Source-based guide · individual gameplay conditions may need verification Maps and screenshots retain their source attribution. Third-party ownership and reuse terms are unchanged.
Walkthrough · 6 / 7
Open the boss route
Basement upper ledge → floor web → three scrubs
- Push the block into the water as a return step, bring a lit stick back up and ignite the floor web.
- Drop through, face the row from the entrance and reflect projectiles in order: middle, right, left. Approach the last scrub to open the door.
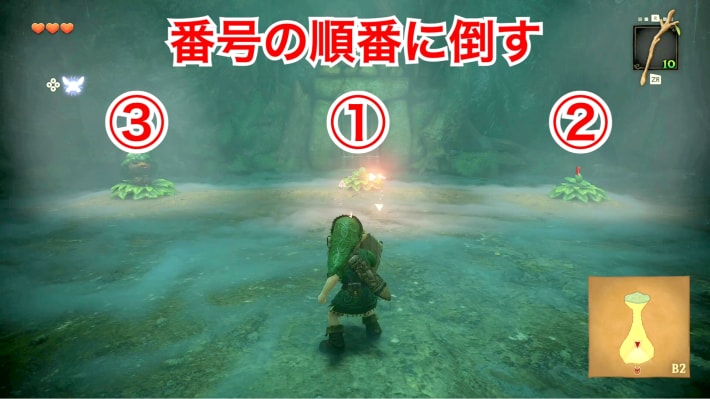
Result / next stop: Boss doorway unlocked; refill health and ammunition before entering.
Could not save. Export your records before leaving.
Source maps and images
GameWith · 2026-11-06Source-based guide · individual gameplay conditions may need verification Maps and screenshots retain their source attribution. Third-party ownership and reuse terms are unchanged.
Step location is described in the guide; no precise map marker is available.
Walkthrough · 7 / 7
Gohma and exit
Boss chamber → Gohma → forest dialogue
- Look up at the ceiling eye. Wait until the eye is exposed, stun with the Slingshot and close in with the sword. Avoid attacking the closed shell.
- Watch the ceiling phase, clear eggs before hatching when possible, then finish the fight and exit dialogue for the Kokiri Emerald.
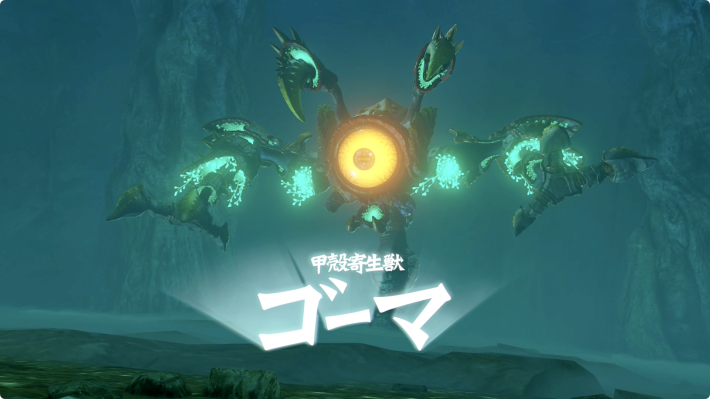
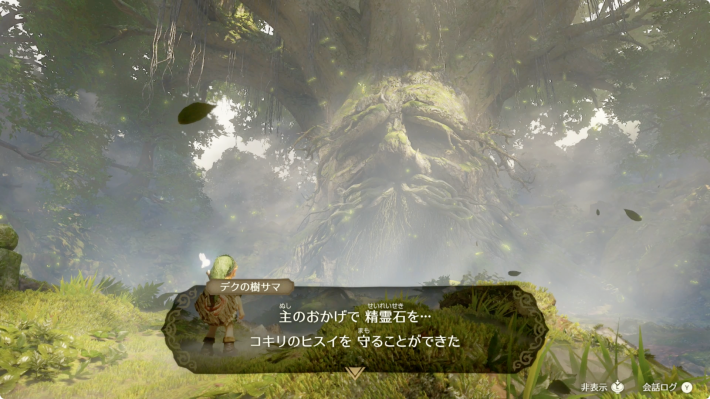
If it goes wrong: Move away from slams and falling eggs; use available room supplies. Eye colors, damage windows and the exact exit interaction remain unverified.
Result / next stop: Main route ends after the forest reward dialogue; continue toward Hyrule Castle.
Could not save. Export your records before leaving.
Source maps and images
GameWith · 2026-11-06Source-based guide · individual gameplay conditions may need verification Maps and screenshots retain their source attribution. Third-party ownership and reuse terms are unchanged.
Related guides
Related Articles
dungeons
Bottom of the Well: Walkthrough (Switch 2)
Follow the Switch 2 route through Bottom of the Well: Drain the village well. Illustrated steps explain the actions, requirements and next objectives.
dungeons
Dodongo's Cavern: Walkthrough (Switch 2)
Follow the Switch 2 route through Dodongo's Cavern: Open the lobby and take the map. Illustrated steps explain the actions, requirements and next objectives.
dungeons
Fire Temple: Walkthrough (Switch 2)
Follow the Switch 2 route through Fire Temple: Rescue the first Goron. Illustrated steps explain the actions, requirements and next objectives.
Was this helpful?
Thanks for the feedback!